How do you play Nomad?
- StartUse a Berzerker Troll as the first contact point, then protect a Centaur behind it. Watch for early leaks; this is a flexible opening, not a guaranteed perfect clear.
- Mid-gameBring in Cyclops as the real tank. Let Blademaster fight beside or just behind it, not as the only body taking hits.
- Damage planCentaur's volley punishes several enemies; Blademaster's Whirlwind punishes enemies gathered around her.
- Buff planShaman hastes the highest-damage eligible ally. A dying Berzerker gives a stronger, shorter haste to the nearest living ally.
- Boss ruleDo not trade away your only wall just to trigger the death buff. Sustained damage needs someone alive to deliver it.
Nomad playstyle: a brawl with a plan
Nomad is Throneward's direct-combat legion. It does not build a shared meter like Inferno's Ignite. Instead, its five fighters cover distinct jobs: ranged multi-target damage, wounded melee pressure, a targeted attack-speed buff, close-range area damage and a heavy stun.
The roster is approachable because its payoffs are visible, but “more damage” is not the whole plan. Nomad wins when durable contact, target selection and attack-speed buffs keep the right fighter active through the next wave.
How Enrage and Bloodlust actually choose targets
Shaman does not simply choose the nearest ally or a fixed unit type. The target must have dealt some damage already and must not currently be under a haste buff. If Blademaster is your damage leader, she is a likely recipient; if Centaur has done more, Shaman can choose the Centaur instead. The decision updates as the fight develops.
Berzerker's dying buff is different: it seeks the nearest living allied fighter. Place the Berzerker close to the carry you want to inherit that burst, but not so far forward that it disappears before it has contributed. If both effects reach one fighter at different times, the newer haste sets that fighter's active haste rather than adding the two multipliers together.
All five Nomad units and current stats
| Tier | Fighter | Cost | HP | Damage | Cooldown | Range | Primary role | Ability |
|---|---|---|---|---|---|---|---|---|
| T5 | Centaur | 40 | 190 | 24 | 0.8s | 11.0 | DPS | Spear Volley · 50 mana |
| T4 | Berzerker Troll | 90 | 540 | 30 | 0.9s | 1.9 | DPS | Enrage · passive |
| T3 | Shaman | 150 | 360 | 30 | 1.0s | 10.0 | Support | Bloodlust · 70 mana |
| T2 | Blademaster | 230 | 820 | 52 | 0.9s | 2.0 | DPS | Whirlwind · 90 mana |
| T1 | Cyclops | 330 | 1,300 | 50 | 1.2s | 2.2 | Tank | Stone Throw · 100 mana |
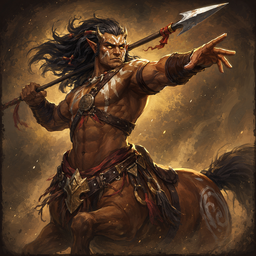
Centaur: cheap, protected pressure
Spear Volley deals 50 ability damage to its target and up to two more nearby eligible enemies. It chooses other victims by proximity to the Centaur rather than piercing a straight line. Its 11-range basic attack keeps it contributing behind a wall, but 190 HP makes an exposed Centaur a poor substitute for frontline.
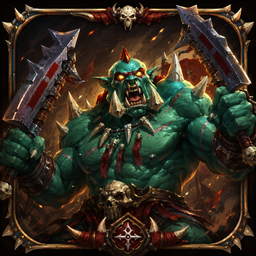
Berzerker Troll: an opening bruiser, not an immortal tank
At under half health, Enrage raises its own attack speed by 1.7×. When it truly dies, the nearest surviving ally gets a stronger 2.2× boost for four seconds. The 540-HP body can handle first contact early, but later you want it beside or behind Cyclops, where it can fight longer before passing on its fury.
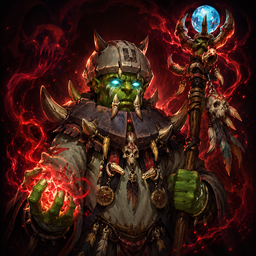
Shaman: reward the damage leader
Bloodlust grants 1.8× attack speed for six seconds to the eligible ally with the most damage already dealt this battle. The Shaman attacks from 10 range to build mana, but its 360 HP calls for a protected rear position. Buy it when you already have a carry doing enough damage to justify the buff.
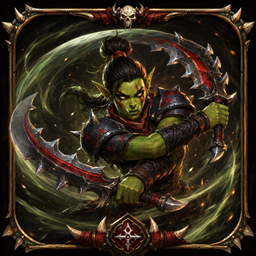
Blademaster: the close-range wave clearer
Whirlwind deals 70 ability damage to every enemy within a 2.4-unit radius around her. Her 52-damage basic hits and fast 0.9-second cooldown make her a compelling Bloodlust target. Put her close enough to reach the pack, but not alone in the lead: 820 HP buys less time than Cyclops's 1,300.
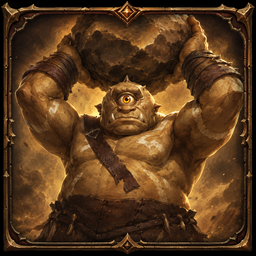
Cyclops: the wall and the pause button
Cyclops has the roster's largest health pool. Stone Throw aims at the densest reachable enemy cluster, then deals 60 area damage and stuns enemies caught within 2.2 units for two seconds. That pause protects the melee core and gives Centaur and Shaman more attack time. A lone Cyclops still needs damage behind it.
A practical Nomad formation
Bring the wave to a centered front. Cyclops is the preferred first-contact anchor once you can afford it. Keep Blademaster and Berzerker close enough to join the same fight but staggered so they do not absorb every first hit together. Place Shaman behind the wall and split your Centaurs across the rear so one area attack cannot erase all ranged damage.
This is a role map, not a required final board. Earlier, a Berzerker occupies the lead tile. Once Cyclops arrives, place the Berzerker close to the fighter you want its death buff to reach. Proximity influences that handoff; Shaman's target depends on battle damage, not formation distance. The unit placement guide explains first contact and anti-area spacing in more detail.
A sensible Nomad opening
Place one Berzerker centrally
It costs 90 of the starting 100 gold. Use its health and melee range to establish first contact, with 10 gold left in reserve. Unlike Inferno's tutorial opener, this is a suggested Nomad starting shape, not a scripted lesson.
First contactAdd protected Centaur damage
Wave 1 pays a 30-gold base clear reward, enough with the saved 10 for a 40-gold Centaur; creep bounties can add more. Put it behind the Berzerker. If the solo front leaked, do not assume the same shape will hold a stronger wave unchanged.
Read the resultFix the missing side of the fight
If enemies reach your Centaur, buy another body before support. If the Berzerker lives but kills too slowly, another cheap ranged attacker may help. Save for Shaman only when damage and survival are already credible.
No forced build orderThe first five waves move from a small swarm to a fast rush, heavy Cinder Golems and a boss. Recheck what survived after each clear; a single-fighter opener can leak even when the King saves the round. The beginner guide gives the broader wave-reading framework.
Spend on the fighter that keeps your tempo
Immediate, protected attacks and another multi-target volley. Good when the wall survives but your kill rate is lagging.
Strong when a current carry has enough uptime and damage to make six seconds of haste valuable. Weak if there is no safe carry yet.
The first true tank and an area stun, but banking for it while Berzerkers are collapsing can make the next wave worse.
A worker costs 60 gold and generates mythium on later waves. That long-term return matters, but spending 60 on economy when the only frontline is already leaking removes almost an entire Berzerker's cost from immediate defense. Prioritize a stable clear, then use the economy guide to judge when a worker is affordable.
Nomad's difficult wave types
Dense swarms
Centaur can split Spear Volley across three enemies, while Blademaster rewards a pack within Whirlwind's radius. Keep the contact point central rather than chasing every edge.
Fast rushes
Waves 3 and 8 are faster than their neighbors. A lone frontliner can be bypassed before your ranged damage finishes the pack; add contact coverage before greed.
Ranged enemies
Wave 7's Bone Slingers and Wave 17's Abyssal Watchers attack from range. Your melee core must travel to them, so watch whether Centaurs take damage before the front catches up.
Bosses and heavy bodies
The boss waves are 5, 10, 15 and 20. Spear Volley has fewer extra targets once escorts die; Cyclops stun and sustained basic attacks matter more than multi-target efficiency.
After a clean swarm clear, your Centaurs lead the damage chart, so Shaman looks tempting. But the next fight is a boss, and the only melee body is a half-surviving Berzerker. A Shaman may haste a Centaur briefly; another frontliner or progress toward Cyclops is more likely to keep both Centaurs firing for the whole fight. Buy the buff once the wall can deliver its full duration.
Nomad in PvP and arenas
In PvP, defend the scheduled wave before an opponent's mercenaries arrive at its tail. A durable send can outlast your first Enrage window; an area slam can hit several tightly packed Nomad melee fighters at once. Scout the available mercenaries and keep the formation capable of fighting after the first target falls. Read the mercenary guide for send and defense rules.
After waves 10 and 20, arenas copy your placed formation against another player's army. Cyclops should absorb first contact so Blademaster reaches close range and Centaurs can attack from behind. A Shaman buff follows actual damage dealt during that arena battle—it does not remember the creep-wave damage chart. If Berzerker dies, nearest-ally placement can decide whether its four-second handoff reaches a carry or a low-damage support.
Seven Nomad mistakes to avoid
Calling Berzerker the late-game tank
Its role is DPS. Cyclops is the true tank; let the Berzerker contribute attacks before its death buff.
Buying Shaman without a carry
Bloodlust chooses an ally that has already dealt damage. A weak or unprotected roster gives the support little to amplify.
Assuming Shaman always buffs Blademaster
It targets the highest-damage eligible ally in the current battle, which can be a Centaur or another fighter.
Trying to stack two Bloodlust buffs
Shaman skips already-hasted allies; a later haste can replace the active one, not add another copy.
Frontlining Blademaster alone
Whirlwind needs nearby targets, but being the sole first contact can kill her before the cast.
Forcing a Berzerker sacrifice
The death handoff is useful when a fighter falls naturally. Trading away its attacks for a short buff can lower total damage.
Ignoring the single-target transition
After escorts die, Spear Volley's extra hits disappear. Bosses test sustained damage and a wall that stays up.
Ready to build a Nomad wall?
Choose Nomad in Solo or multiplayer, place a frontline first, and use the damage chart to learn where your next Bloodlust belongs.
Play Nomad free