How do you play Heaven?
- OpeningStart with a Crossbowman in a protected rear tile, then add a Knight in front after Wave 1. This opening was checked against the current solo simulation.
- ContactKnight's Shield Wall protects the Knight itself while it stops attacking. It is not a shield for the whole army.
- DamageAngle Crossbowman so Piercing Arrow crosses several enemies. Add Paladin near the front and Angel when the formation can protect its attacks.
- SustainCleric heals every living ally when at least one is wounded; Paladin heals only nearby allies during Divine Storm.
- Best habitBuy healing when several fighters can live to use it. If the wave outruns your damage, add attacks before another support.
Heaven wins by extending useful combat time
Heaven looks defensive, but its strongest fights still need damage. Knight delays the first collapse, Crossbowman turns a straight enemy line into multiple hits, and Cleric can restore the entire group. Paladin contributes area damage and local healing. Angel is the expensive payoff: a high-health damage dealer whose empowered swings heal itself.
Think of Heaven as a timing legion, not a promise of invulnerability. The goal is to give Crossbowman, Paladin and Angel more productive attack cycles than the incoming wave can afford.
What Heaven's protection and healing actually do
For four seconds, the Knight stands still and does not attack. Incoming damage to that Knight is reduced by 70%; half the incoming pre-reduction hit is reflected at the attacker.
When at least one ally is wounded, every living ally receives 45 health plus 10% of its own maximum health, capped at full health. It does not revive the dead.
Enemies within 2.4 units take 85 damage; the Paladin and allied fighters within the same radius recover up to 60 health each.
For seven seconds, Angel attacks twice as fast, its basic hits deal 1.8× damage, and each hit restores up to 50 of its own health.
These effects answer different problems. Shield Wall protects a position while the Knight pauses its own offense. Cleric's spell reaches the whole team, wherever the allies stand, but is only useful after damage has been taken. Paladin's healing is localized: it rewards a nearby front pair, not a Cleric standing far behind. Angel's self-heal works only if it keeps swinging during Holy Blade.
All five Heaven units and current stats
| Tier | Fighter | Cost | HP | Damage | Cooldown | Range | Primary role | Ability |
|---|---|---|---|---|---|---|---|---|
| T5 | Knight | 40 | 305 | 29 | 0.9s | 1.9 | Tank | Shield Wall · 50 mana |
| T4 | Crossbowman | 90 | 340 | 40 | 0.8s | 12.5 | DPS | Piercing Arrow · 70 mana |
| T3 | Cleric | 150 | 340 | 30 | 1.0s | 10.0 | Support | Heal · 85 mana |
| T2 | Paladin | 230 | 880 | 50 | 1.0s | 2.0 | DPS | Divine Storm · 85 mana |
| T1 | Angel | 330 | 1,400 | 65 | 1.0s | 2.2 | DPS | Holy Blade · 70 mana |
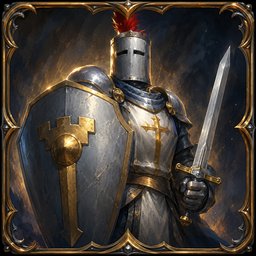
Knight: your inexpensive first-contact shield
Knight's 305 HP is modest, so its four-second stance is the real defensive purchase. While the wall is up, Knight takes only 30% of incoming damage and reflects half of the pre-reduction hit at an attacker. It stops attacking and moving during that stance. Use one to intercept enemies, not as a reason to leave the rest of the board unguarded.
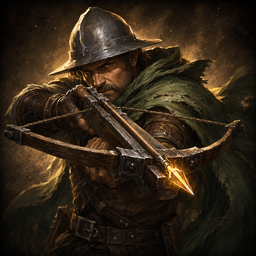
Crossbowman: aim for the whole line
Its 40-damage basic attack reaches 12.5 units. At full mana, Piercing Arrow deals 70 to every enemy within one unit of a straight ray extending through the target across the field. The cast is piercing; its normal shot is not. A protected angle facing the route enemies travel can make one cast worth several single-target attacks.

Cleric: heal the living team, not the dead
Heal restores 45 plus 10% of each living ally's own max HP when any ally is wounded. A 1,400-HP Angel can receive up to 185 from one cast; a 305-HP Knight receives up to 76. Actual healing stops at full health. Keep Cleric attacking safely to earn mana, and buy it after enough bodies exist to benefit.
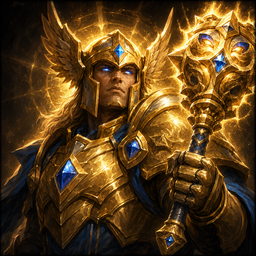
Paladin: a front-side damage and heal engine
Divine Storm hits every nearby enemy for 85 and restores up to 60 health to the Paladin and each ally within 2.4 units. With 880 HP, Paladin can join the front, but should not stand so far from Knight or Angel that its healing touches only itself. Against sparse targets, value its strong basic attacks even when the storm hits only one enemy.

Angel: the durable finishing carry
Angel has 1,400 HP but is classified as damage, not the roster's primary tank. Holy Blade doubles its attack speed, multiplies basic-hit damage by 1.8 and heals it for up to 50 per hit for seven seconds. It needs time to charge 70 mana and a reachable target to exploit the window. Put it close enough to fight without making it absorb every initial hit.
A practical Heaven formation
Center the first contact on a Knight. Keep Paladin and Angel one step behind or alongside that anchor so they enter the fight quickly, and keep Paladin within healing distance of another valuable melee fighter. Cleric can stand deeper because its Heal is team-wide. Crossbowmen need open attack time and a useful angle through the enemy's path.
It is a role map, not a fixed end board. Early on, Crossbowman can be the only placed fighter; the Knight arrives after the first clear. Later, widen contact if fast enemies slip past a single Knight. Do not bunch the entire backline simply to make the army look symmetrical: boss slams and sent area attackers punish tight clusters.
A tested Heaven opening
Start with Crossbowman
Place one 90-gold Crossbowman near the center of the rear half of the board. That leaves 10 of the starting 100 gold. Its 40-damage basic attack and Piercing Arrow provide enough early killing power in the current solo simulation, even without a Knight in Wave 1.
Damage firstPut a Knight in front
A clean Wave 1 pays 30 base gold plus up to 25 one-gold Emberling bounties. With the 10 saved, that is enough for a 40-gold Knight. Place it in the central front so the Crossbowman can keep firing as Hellhounds arrive.
Protect the carryChoose damage, contact or healing
If the Knight survives but kills take too long, add another Crossbowman. If enemies reach the backline, strengthen first contact. Consider Cleric only after the formation has multiple living fighters to restore.
Do not rush supportIn a 20-seed test of the current solo simulator, this Crossbowman-then-Knight sequence cleared both opening waves without leaks. It is a useful baseline, not a guarantee against human PvP sends or every later wave. Check the post-wave damage and survival results before repeating a purchase.
Heaven economy: pay for the missing job
The least expensive way to add another first-contact body and a personal defensive stance.
Direct damage plus another line-clearing cast when protection is adequate but the wave is outliving you.
Worth more as your army grows. If one frontliner dies before its first Heal, support was probably not the missing purchase.
A worker costs 60 gold and produces mythium on later clears. That can compound through sends and income, but 60 removed from immediate defense can also turn a clean early lane into a leak. Treat a healthy Knight and active Crossbowman as evidence for economy; do not buy a worker just because Heaven has healing later. See the economy guide for the full worker and income calculation.
Paladin at 230 and Angel at 330 are strong transitions when the cheaper core already functions. Saving for Angel while the only Crossbowman is exposed often costs more than its eventual self-heal can recover.
How Heaven handles difficult waves
Dense swarms
Line up Piercing Arrow with the advancing pack, then let Paladin's Divine Storm catch enemies around the Knight. More Knights without damage can prolong the swarm instead of clearing it.
Fast rushes
Spine Crawlers on Wave 3 and Ash Stalkers on Wave 8 test whether your wall covers more than one path to the backline. Move or add contact before a rushed Cleric purchase.
Ranged waves
Bone Slingers on Wave 7 and Abyssal Watchers on Wave 17 attack before melee meets them. Watch whether your Crossbowman and Cleric take damage while the Knight walks forward.
Bosses
Waves 5, 10, 15 and 20 add a huge boss with an escort. Once the escort dies, Piercing Arrow hits fewer targets; Holy Blade and sustained basics matter more. Spread valuable fighters against the boss's area slam.
Your Knight and Crossbowman finish a swarm with the Knight at half health. You can afford Cleric, but the next wave's rush may get around that lone Knight before the Cleric earns 85 mana. Adding a second contact body or another Crossbowman is the safer immediate fix. When the line consistently holds long enough for a cast, Cleric turns those damaged survivors into a much longer fight.
Heaven in PvP and arenas
In PvP, the scheduled wave arrives first and sent mercenaries join at its tail. A heavy or area-damage send can outlast Knight's four-second stance or hit the healers behind it. Keep enough damage to finish the first pack before the second threat arrives, and do not assume Cleric can repair a unit that is killed in a single burst. The mercenary guide explains what each send changes.
After Waves 10 and 20, the arena copies the formation you placed. Crossbowman's piercing cast is strongest when enemies line up, but an opposing army can arrive from a different angle than a creep wave. Knight should still receive first contact, with Paladin close enough to heal an ally during Divine Storm. Angel needs to live long enough to arm Holy Blade; its large health pool does not make it a substitute for every Knight.
Seven Heaven mistakes to avoid
Thinking Shield Wall covers the army
It reduces damage to the Knight itself. Positioning still determines whether enemies can reach the backline.
Expecting Knight to attack in its stance
For four seconds it stands fast. Buy actual damage behind the wall.
Using Cleric as a resurrection
Heal restores living allies only and waits until someone is wounded. A dead carry receives nothing.
Giving Paladin no nearby allies
Divine Storm's healing uses the same 2.4-unit radius as its damage. Cleric's Heal, by contrast, reaches the whole team.
Assuming every Crossbowman shot pierces
Piercing Arrow is the mana ability. Normal basic attacks hit one target.
Frontlining Angel just for its HP
Its strongest value is the seven-second Holy Blade attack window. Protect the first charge.
Buying only sustain
Fights can still be lost by slow kills, especially against heavy targets or a second PvP threat.
Ready to hold the line?
Choose Heaven in Solo or multiplayer, try the Crossbowman-and-Knight opener, and use the damage chart to decide when healing is worth its cost.
Play Heaven free