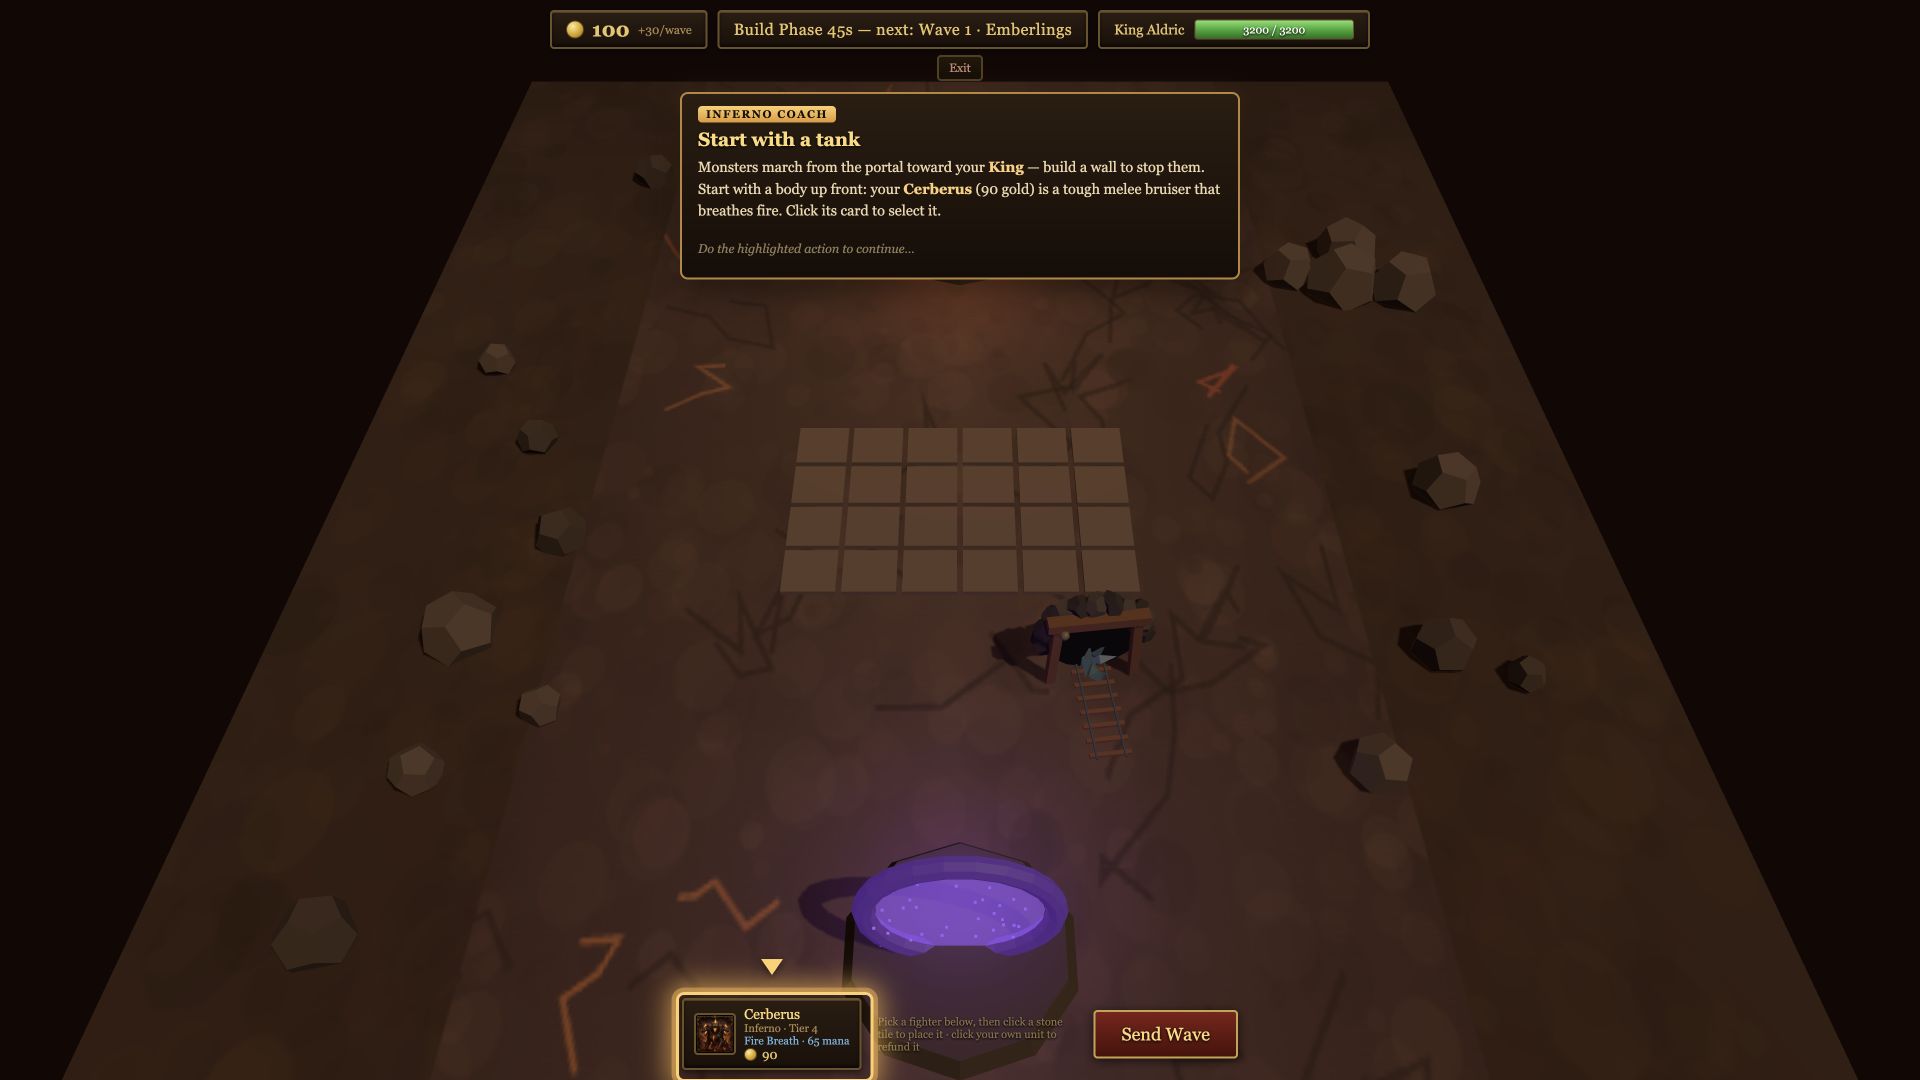
The short answer: how should you place units?
- FrontPut durable melee fighters near the enemy portal so they take first contact.
- Second lineOffset fragile melee damage behind the tanks so it joins without becoming the first target.
- BackPlace long-range damage where it can fire through the frontline instead of walking into danger.
- Protected centerKeep supports safe while covering the fighters that benefit most from their abilities or auras.
- SpacingStay close enough to focus targets, but do not compress every valuable fighter into one boss slam.
Read the 6×4 board from front to back
Enemies enter from the portal above the grid and march toward the King's Court below it. That makes the top row Row 1, the frontline, and the bottom row Row 4, the back line. The board is six tiles wide and four tiles deep, for a maximum of 24 placed fighters.
The example is a starting shape, not a build to copy tile for tile. A fighter's range, durability and ability matter more than its tier number. Some expensive units belong in front; others are valuable precisely because they can work from safety.
Place by combat role, not purchase tier
Tanks and durable bruisers
Use the front one or two rows. Their health only protects the army if enemies hit them before reaching fragile fighters.
Melee damage
Start one line behind or slightly off-center from the main tank. It should join quickly without winning the race to first contact.
Ranged damage
Start farther back and use its actual attack range. If it walks forward before firing, move it closer; if it is being reached first, move or screen it.
Supports
Protect them, then check whom the ability must reach. A safe support that covers nobody is just as misplaced as an exposed one.
Do not treat “melee” as a synonym for “tank.” A high-damage melee fighter can die before earning its cost when placed on the leading edge. Give it a durable body to follow, then compare damage dealt and damage taken after the wave.
Likewise, “back row” is not mandatory for every ranged fighter. Range values differ. Position it so the frontline engages first and the ranged unit can begin attacking with little wasted movement.
How aggro and first targeting really work
At the start of combat, each fighter looks for the nearest enemy it can acquire from around its deployment point. A fighter that sees nothing may assist a nearby ally by joining that ally's target. Once it has engaged, it stays in the fight and can pursue enemies across the lane rather than leashing back to its tile.
- Your lead unit sets the meeting point. Moving one durable fighter forward can make the whole battle begin higher on the board.
- Offset units approach from different angles. That can spread incoming attacks, but an isolated flank can also be surrounded before help arrives.
- Attack range changes movement. Melee fighters close distance; ranged fighters stop as soon as their target enters range.
- Targets can change in contact. If the locked enemy is unreachable while another is already in attack range, the fighter can switch to the reachable threat.
This is why a one-tile change can produce a very different result with the same army. Placement alters the first target, walking time, approach angle and the moment each damage dealer begins contributing.
If a fragile fighter takes the opening hits, move it behind the unit you intended to tank. If a healthy fighter spends the opening seconds walking while the frontline dies, move it closer or reduce the gap between groups. Change one relationship at a time so the next combat reveals the cause.
Balance focus fire against area damage
Compact formations reach the same targets quickly and make support coverage easy. They also let one area attack touch several important fighters. Bosses on waves 5, 10, 15 and 20 carry Cataclysm Slam, and Wall Breaker or Dread Behemoth mercenaries can punish the same clustering mistake.
Your frontline and damage dealers should still reach the same engagement. Extreme splits often turn one strong army into two weak fights.
Do not stack every ranged carry and support directly behind one tank. A sideways gap can preserve focus while reducing shared exposure.
Use the build phase to add modest breathing room. Adjacent positions may still be caught together, so judge the combat rather than the diagram alone.
Spacing is not a command to fill all six columns. Start with a centered formation so the wave does not wrap around both sides, then widen only enough to solve a specific collision, targeting or area-damage problem. The mercenaries guide explains which send effects reward an opponent for staying too dense.
Protect range and support coverage
Supports create a second placement problem: safety and reach must overlap. Continuous auras affect allied fighters only inside their radius, while targeted abilities may use a separate command range. Move a support too far back and its best allies lose the effect; move it too far forward and the support dies before the effect matters.
Mountain Giant
Stoneward reduces incoming damage for nearby allies. It is durable enough to anchor the wall, but its position should still cover the fighters actually taking hits.
Moon Elf
Moonsong increases nearby basic-attack damage and speed. Protect her while keeping the damage dealers you want to amplify within the aura.
Yggdrasil
Worldroot continuously heals nearby allied fighters. A protected central position can cover front and back without volunteering as first contact.
Dynasty commanders
Banner Captain rescues a wounded ally toward home, while Imperial Guardian shields the current frontline. Their formation-aware abilities reward a coherent core.
Aura effects can overlap, but they have caps and exposed support units still die. First keep the source alive, then maximize the number of useful recipients—not simply the number of colored circles you could imagine around it.
Adapt the same formation to the next threat
Prevent the wraparound
Keep enough width and frontline bodies to catch several enemies, but do not strand a lone tank on each edge. Your damage must be able to help both contacts.
Coverage checkProtect the walk-in
A wall that stops too early can leave melee fighters crossing open ground while ranged enemies attack. Watch who walks, who fires and where your frontline actually settles.
Engagement checkSpace the slam, preserve single-target damage
Use a durable lead, separate valuable backliners from one another and keep enough of the army focused to kill the boss before its escalating pressure takes over.
AoE and duration checkBuild for the extended fight
Mercenaries arrive behind the scheduled wave. The frontline must have enough life left for ranged damage and supports to keep working through the extra bodies.
Survivor checkUse the next-wave preview and previous result together. The preview identifies the new demand; the combat statistics reveal whether your current wall lacks time, damage, coverage or durability.
Placement matters differently at the King and in arenas
Shared King defense
When a lane clears while the court is under attack, its living survivors redeploy to help the shared King. Clear speed and remaining health decide what help arrives.
King lineup is rebuilt
Your original tile pattern is not carried into the court. The board placement matters because it shaped who survived and how quickly the lane cleared.
Arena copies placement
After waves 10 and 20, exact copies of the teams' board formations face each other. Frontline depth, protected damage and support coverage transfer directly.
Wave 10 is feedback
Watch which side reaches first, which carry fires immediately and whether support effects cover the fight. You can adjust before the final arena.
A formation that barely clears after losing every frontline body may survive its own lane but contribute nothing to an allied leak. A cleaner formation creates spare defenders. In versus play, it also needs to fight an enemy army directly; see the multiplayer and PvP guide for the complete arena sequence.
Review every clear in the right order
- Watch first contact.Did the intended tank receive the opening attacks, or did a fragile fighter step ahead?
- Watch idle time.Did any damage dealer spend too long walking, blocked or waiting outside range?
- Watch the collapse.Did the whole frontline disappear together, or did one isolated side fail first?
- Read the statistics.Compare damage dealt, damage taken, healing and survival with the job each fighter was meant to perform.
- Make one deliberate change.Add the missing role or adjust a relationship. Undo is available during the current build phase; older fighters sell for only 60%.
Your tank survives, but a melee damage fighter dies first after starting beside it. Move the damage fighter one row back and one column inward. On the next wave, the tank should establish contact before the damage fighter joins. If damage rises and the fighter survives longer, placement—not raw unit value—was the missing upgrade.
Eight placement mistakes to avoid
Frontlining every melee
Fragile melee damage needs a tank to arrive first.
Hiding every ranged unit
Excess depth can waste time if the fighter walks before attacking.
Building across all six columns
A formation spread too early struggles to focus one engagement.
Stacking on one tile cluster
Boss and mercenary area attacks punish unnecessary density.
Exposing the support
A powerful effect provides little value when its source takes first contact.
Missing aura recipients
A protected support still fails if the intended allies fight outside its reach.
Changing five things at once
You lose the evidence that would explain why the next result changed.
Panic-selling veterans
After a fighter has battled, selling returns only 60% of its cost.
Ready to test one tile at a time?
Open the free tutorial, place a durable frontline and watch exactly when each fighter joins the battle.
Play Throneward free