How do you play Blight?
- Open leanOne Plaguebearer can clear the first solo wave. After a clean clear, use the 120 gold to place a Carrion Hound before Wave 2. Add more seeders as waves speed up.
- Feed the HoundKeep it near enemies that die while Rot is active. Each qualifying death grows its damage and maximum HP, up to eight times per wave.
- Spread the plaguePlaguebearer's bolt adds three Rot stacks. Rotted deaths pass stacks to nearby enemies; Defiler can copy stacks from the most infected target into a nearby pack.
- Protect the enginePestilence is the true tank and applies Rot around itself. Place Defiler and Plaguebearers behind the contact line, where they can keep casting.
- Choose the finishLich's Reap converts existing stacks into immediate damage, especially useful against a boss. It also consumes those stacks, so a Reap kill cannot trigger their normal death spread or Hound feeding.
Blight playstyle: compound the first infection
Blight is the patient attrition legion. Its cheap Plaguebearer has low direct damage, and its first Carrion Hound begins as a fragile melee fighter. They become dangerous together: Rot drains health, an infected death spreads the plague, and the nearby Hound grows from that death. Defiler increases Rot's impact, Pestilence keeps it applied around the front, and Lich trades accumulated stacks for burst.
That dependence makes Blight more demanding than its cheap prices suggest. Buy enough actual bodies to survive first contact, then invest in the effect that the next wave will let you exploit. Compare its role mix with the other seven armies in the legions guide.
How Rot, Contagion and Virulence work
Rot is a damage-over-time effect, not Inferno's three-crystal detonation. Every application adds stacks up to a cap of ten and refreshes the four-second decay timer. Per stack, the current damage rate is 7 + 0.0018 × the target's maximum HP per second. That flat part handles small creeps; the maximum-HP part keeps the plague relevant on a boss. Unrefreshed stacks disappear after four seconds.
When a rotted enemy dies, Contagion reaches up to its three nearest living allies within 2.5 units. Each takes 10 direct damage and receives half the dead enemy's Rot stacks, rounded down. A one-stack death still makes the 10-damage burst, but passes zero stacks; build at least two stacks on a target to start a true infection chain. This spread can itself finish a weak target and continue the chain.
Defiler's Virulence lasts six seconds. During that window, your Rot ticks 35% harder, and new Rot applications last 40% longer. On casting, it also copies half the stacks, rounded down, from the most-rotted enemy to other enemies within 4.5 units of that enemy. If no target has Rot, the damage window opens but no stacks spread. Place a seeder early enough to give Defiler something to amplify.
All five Blight units and current stats
| Tier | Fighter | Cost | HP | Damage | Cooldown | Range | Primary role | Ability |
|---|---|---|---|---|---|---|---|---|
| T5 | Plaguebearer | 35 | 160 | 16 | 0.8s | 11.0 | DPS | Pestilent Bolt · 22 mana |
| T4 | Carrion Hound | 110 | 480 | 26 | 0.9s | 1.9 | DPS | Devour · passive |
| T3 | Defiler | 110 | 360 | 25 | 1.0s | 10.0 | Support | Virulence · 70 mana |
| T2 | Pestilence | 240 | 1,300 | 50 | 1.1s | 3.0 | Tank | Miasma · 85 mana |
| T1 | Lich | 270 | 820 | 40 | 1.0s | 11.0 | DPS | Reap · 95 mana |
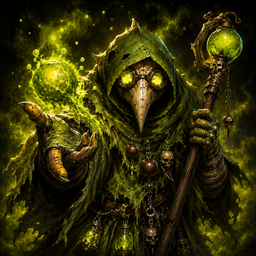
Plaguebearer: the cheap seeder
Pestilent Bolt hits one enemy for 18 direct damage and adds three Rot stacks for 22 mana. Its ordinary attacks add eight mana each, so three can charge the bolt without being hit. At 160 HP it belongs behind a body, where repeated bolts keep the timer refreshed and set up Contagion.
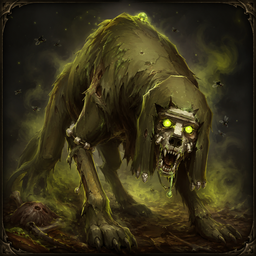
Carrion Hound: grow it before it has to carry
Each basic hit applies one Rot stack if its target survives. When a rotted enemy dies within 4.5 units, Devour adds three damage and 14 maximum HP, healing the Hound by 14. It can feed eight times per wave and 50 times over its life. The earned stats persist between waves only while that Hound survives; death and respawn reset them.

Defiler: make the existing plague matter
Virulence spreads stacks from the most-infected enemy to its nearby pack, increases Rot damage by 35% and lengthens newly applied stacks by 40% for six seconds. It does not heal or protect your frontline. Buy it after you have reliable seeders and a fight long enough for the amplification to pay off.
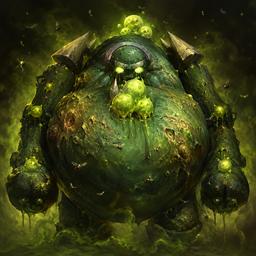
Pestilence: durable infection radius
Pestilence has 1,300 HP and three-unit attack range. Basic hits apply one Rot stack, and its 85-mana Miasma adds one stack to every enemy within six units of itself. Miasma has no direct hit: the damage comes from the Rot that follows. Place this unit where a group must pass, not stranded away from the pack.

Lich: turn stacks into a finish
Reap deals 12 damage per Rot stack to infected enemies within 2.5 units of its target, then removes those stacks. If nothing near its target has Rot, Lich holds its charge and continues ordinary attacks rather than wasting the cast. Against a boss, it supplies timely damage; against a swarm, consider whether consuming the stacks costs you a larger Contagion chain.
A formation that keeps Rot near the Hound
Blight cares about where enemies die. Put Pestilence at the front of a developed board to collect contact and apply Miasma across the arriving group. A Carrion Hound should fight just behind or beside it, close enough to feed from rotted deaths without taking every first hit. Plaguebearers and Defiler need clear, protected rear positions; Lich can stand with the backline and target the infected cluster.
This is a later role map, not a starting shopping list. The tested opening starts with just one Plaguebearer in a central rear tile and a Hound toward the incoming side. Do not save for Pestilence while a current wave needs an immediate body. The unit placement guide covers first contact and spacing against area damage.
A tested Blight opening through Wave 5
Start with one Plaguebearer
Spend 35 of the starting 100 gold. A central rear tile lets it keep firing at Emberlings without becoming the front line. It cleared Wave 1 in the tested solo seeds; the clean clear leaves 120 gold for the next build.
Save for early DevourBuy Carrion Hound
Its 110-gold price is now affordable. Put it ahead of the seeder, where rotted Hellhounds will die within Devour range. Early feedings matter: the Hound earned the full eight-per-wave growth cap in the sampled Wave 2 clears.
Start the snowballThicken the infection line
Add a second Plaguebearer before the fast Spine Crawlers on Wave 3, then two more before the heavy Cinder Golems on Wave 4. Spread their rear tiles so one contact failure does not expose every seeder.
Four seeders totalAdd Defiler for the boss
After clean clears, the sequence leaves enough for a 110-gold Defiler before the Hellgate Sentinel and its escorts. The Plaguebearers put Rot on targets; Virulence makes those stacks hurt more and helps them spread.
Amplify existing RotIn 30 seeds of the current solo simulator, this one-Plaguebearer → Hound → second Plaguebearer → two more Plaguebearers → Defiler sequence cleared Waves 1–5 without leaks. The surviving Hound reached 32 Devour feedings after Wave 5 in those runs. That is a solo baseline, not a guarantee against PvP sends, alternate placement or a changed game version; buy an extra early seeder or sturdier contact if your actual clear looks unsafe.
When to buy each part of the plague
For 35 gold, another Plaguebearer adds attacks and three-stack bolts. Use it when too few enemies are infected before the first deaths.
Defiler at 110 gold amplifies and spreads Rot already being applied. It is weak value if enemies die or reach the backline before the effect matters.
Pestilence at 240 gold is the real tank. Its Miasma helps nearby seeders, but buy the health for survival rather than treating it as a pure damage upgrade.
Carrion Hound and Lich ask different timing questions. The 110-gold Hound benefits from joining early and surviving many rotted deaths. The 270-gold Lich converts a prepared infection into immediate damage, useful when a boss has too much health for ordinary ticks. A 60-gold worker may build longer-term income, but delaying the Hound can cost several waves of growth; weigh that tradeoff with the economy guide.
Your Plaguebearers cover most of a swarm, but the Hound dies at the first collision. Another Defiler would boost the Rot already on enemies, yet would not save the Hound's accumulated Devour stats. Prioritize Pestilence or an additional contact body, then return to amplification once the growth engine survives.
Where Blight's timing gets tested
Fast rushes
Wave 3 Spine Crawlers and Wave 8 Ash Stalkers can reach weak seeders before Rot finishes its first target. Add bodies and protect the rear before buying a second amplifier.
Dense swarms
These are opportunities if the front lives. A rotted death within 2.5 units of the next enemies can pass stacks and a small burst to three survivors, while a nearby Hound feeds.
Ranged waves
Bone Slingers on Wave 7 and Abyssal Watchers on Wave 17 can attack while your melee core approaches. Keep seeders separated and give Pestilence a route to contact.
Bosses
Waves 5, 10, 15 and 20 contain a major boss and escorts. Rot's maximum-HP component remains useful, but Contagion has fewer bodies to bounce through. Lich's Reap is the deliberate single-target cash-out.
Blight in PvP and arenas
In PvP, sent mercenaries arrive at the tail of the scheduled wave. A late durable send may reach your Hound after the small creeps have already died, leaving fewer nearby rotted deaths to feed it. Check whether your infection sources can reapply Rot to that second threat and whether your front remains intact. The mercenary guide explains send timing and roles.
After Waves 10 and 20, arenas copy the placed formation. Keep the Hound near likely kills and Plaguebearers safely behind the contact line. Pestilence's six-unit Miasma is strongest where both armies meet; Defiler needs a rotted enemy to spread from. Lich can finish an infected, high-health target, but a Reap kill that strips its Rot will not generate Contagion or Devour. Evaluate whether immediate damage or another feed chain wins that particular fight.
Seven Blight mistakes to avoid
Letting Rot expire
Stacks fall off after four seconds without a fresh application. Keep a seeder attacking the priority target.
Counting one stack as a chain
A one-stack death deals Contagion's flat burst but passes zero stacks to survivors.
Putting Hound too far from deaths
Devour checks 4.5 units from each rotted corpse. A safe Hound that never feeds stays small.
Assuming Hound growth survives death
It persists across waves while that unit lives; a dead Hound is respawned at base stats.
Buying Defiler before seeders
Virulence can open its buff with no Rot to copy. Give it infected targets first.
Expecting Miasma impact damage
Pestilence's cast applies Rot in a radius; the damage arrives as the stacks tick.
Reaping away a useful death chain
Lich consumes Rot before killing. Those targets cannot then spread the removed stacks or feed the Hound.
Ready to start a chain reaction?
Choose Blight in Solo or multiplayer. Watch which enemies die while rotted, keep your Hound near those deaths and spend the next gold where the chain breaks.
Play Blight free